How to Test Concrete Moisture Before Flooring: Pinless Meters, RH Probes and ASTM Methods
Learn how to screen concrete moisture, select suitable test locations and determine when ASTM F2170 or F1869 testing is required before flooring.
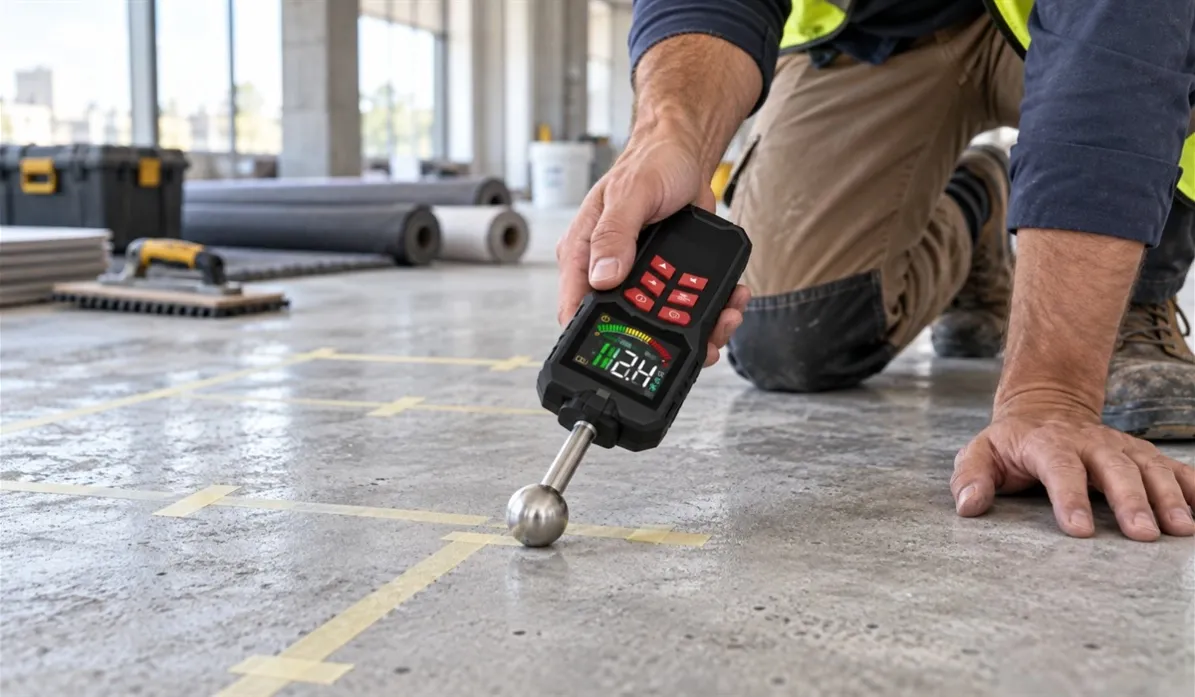
A concrete slab can look dry and still release enough moisture to damage adhesive, resilient flooring, wood, laminate or a coating system. The difficult part is not simply taking a reading. It is choosing a test method that answers the right question.
A handheld electronic moisture meter is useful for quickly scanning a slab and locating areas that behave differently. It does not automatically provide a universal pass-or-fail percentage for flooring installation. When a project specification, flooring manufacturer or warranty requires a recognized acceptance test, an in-situ relative humidity method or another specified test must be completed correctly.
This guide explains how contractors use moisture meters during a concrete-floor survey, when ASTM methods enter the process, and what distributors should verify when sourcing moisture-testing instruments.
Why concrete can feel dry but still create a flooring problem
Concrete dries from the exposed surface inward. The upper layer may appear dry while moisture remains deeper in the slab. Once low-permeability flooring or coating is installed, the moisture condition can change and vapor can accumulate beneath the finished system.
Excess moisture may contribute to:
- loss of adhesive bond;
- bubbling, blistering or discoloration;
- cupping or dimensional movement in wood-based products;
- deterioration of moisture-sensitive underlayments;
- alkaline deposits and damage at the adhesive interface; and
- delays, replacement costs and warranty disputes.
Slab age alone is not a reliable acceptance criterion. Mix design, thickness, curing, vapor protection, weather and indoor conditions all influence drying. Testing is therefore a measurement of the slab at specific locations and at a specific time—not a permanent certificate that conditions can never change.
Four ways to check concrete moisture before flooring
The methods below are not interchangeable. Each measures or indicates a different part of the moisture problem.
| Method | What it tells you | Best use | Important limitation |
|---|---|---|---|
| Non-destructive electronic moisture meter | Comparative response near the surface or within the instrument's sensing field | Rapidly mapping a floor and selecting locations for further testing | The scale may be relative; density, salts, metal and surface conditions can affect readings |
| In-situ relative humidity probe | Relative humidity inside the slab at a specified depth | Quantitative testing under ASTM F2170 when specified | Requires drilling, correct placement, conditioning and documentation |
| Anhydrous calcium chloride test | Moisture vapor emission rate from the concrete surface area | Testing under ASTM F1869 when accepted by the floor-system specification | Measures emission during the test period and requires correct surface preparation |
| Plastic-sheet observation | Visible condensation or darkening beneath a sealed sheet | A rough warning check during an early site inspection | A negative observation does not prove that the slab meets an installation requirement |
Screening is not the same as acceptance testing
This is the distinction that prevents many bad flooring decisions.
Screening asks: where should we investigate?
A non-destructive meter can cover a large floor quickly. Used in a regular grid, it can identify unusually high-response areas, possible moisture pathways and locations that deserve a closer look. This is valuable during site surveys, restoration work and quality control.
ASTM F2659 describes the use of non-destructive electronic moisture meters for preliminary evaluation of the comparative moisture condition of concrete and similar floor slabs. The word comparative matters. The strongest use is comparing readings across the same slab under similar conditions.
Acceptance testing asks: does this slab meet the specified limit?
The final decision must follow the contract and the current installation instructions for the flooring, adhesive, underlayment or coating system. A manufacturer may require in-situ RH testing, calcium chloride testing or another documented procedure. The result must be expressed in the units used by that requirement.
A reading of “5%” from one handheld meter cannot automatically be compared with an RH limit from an in-situ probe or a moisture vapor emission limit. They are different measurements with different units and sampling depths.
How to check a concrete slab before flooring installation
1. Start with the floor-system requirements
Before bringing a meter to the site, identify the flooring material, adhesive, primer, underlayment and any moisture-mitigation system. Obtain the latest installation limits and required test methods. Do not assume that a limit used for one vinyl, wood or epoxy system applies to another.
2. Confirm that the building is in the required condition
Concrete moisture results are influenced by temperature and ambient humidity. Where the selected method or manufacturer requires service conditions, the building should be operating within those conditions for the stated period before and during testing. Record room temperature, relative humidity and slab temperature.
3. Inspect the slab before measuring
Look for cracks, staining, efflorescence, previous adhesive, coatings, penetrations and areas close to exterior walls or plumbing. Note whether the slab is on grade, below grade or suspended, and whether information about the vapor retarder is available.
A moisture meter should complement this inspection rather than replace it.
4. Create a repeatable scanning grid
Divide the floor into practical zones and take readings at consistent intervals. Keep the meter orientation, contact pressure and surface preparation as consistent as possible. Mark locations on a drawing instead of relying on memory.
Choose a dry-looking reference area on the same slab, then compare the rest of the floor with it. Record the highest readings as well as the normal range. An isolated high reading is more useful when its location and surrounding pattern are documented.
5. Investigate unusual readings
Repeat the measurement after checking the surface and meter mode. Consider whether metal reinforcement, embedded services, salts, a different concrete mix, a patching compound or residual coating could be affecting the response.
A thermal camera can sometimes help identify temperature patterns associated with evaporation or water movement, but it does not measure moisture directly. For building-inspection applications, compare findings with a suitable moisture meter and physical inspection. ZYD's HT04D thermal imaging camera is one example of a complementary inspection instrument.
6. Perform the specified quantitative test
Use the number and distribution of test locations required by the applicable standard and project documents. Follow the current procedure and the probe or test-kit manufacturer's instructions. Record hole locations, depths, times, calibration or verification information and environmental conditions as required.
Electronic scanning can help choose additional investigative points, but it should not be used to reduce the minimum number of required standard tests.
7. Compare results with the correct limit
Compare each result with the limit for the exact flooring and installation system. If the slab does not comply, the responsible project parties may need to allow more drying time, investigate the moisture source, select an approved mitigation system or change the installation plan.
8. Retest when conditions change
A result represents conditions at the time and location of the test. Water entry, HVAC changes, wet trades or mitigation work can change the slab. Follow the project requirements for retesting and final documentation before installation.
Why a concrete moisture meter may show a misleading result
The wrong material mode
A wood moisture-content scale is calibrated around electrical behavior in wood. Concrete is chemically and physically different. Only use a masonry, concrete or relative mode when the manufacturer provides one, and understand whether the displayed number is a percentage or an index.
Reinforcement or other metal
Rebar, metal mesh, pipes and conductive material within the sensing field may increase the meter response. An unusually high point should be checked against drawings, site knowledge and surrounding readings.
Salts and concrete composition
Electrical properties vary with salts, density, aggregate, water-to-cement ratio and admixtures. This is one reason readings from two different slabs should not be compared as if they were the same material.
Poor surface contact
Dust, debris, texture, curvature and uneven coatings can prevent a flat sensor from coupling consistently with the surface. Clean the test area as permitted and follow the instrument's contact requirements.
Surface water or recent cleaning
A wet surface can dominate a shallow reading. Record recent cleaning, rain exposure or water leaks and allow the appropriate condition before interpreting the survey.
Different sensing depths
Two instruments may respond to different volumes of material. A “deeper” claim is only meaningful when the manufacturer explains the sensing field and limitations. It does not make a surface meter equivalent to an in-situ RH probe.
How to interpret pinless readings on concrete
Use the meter as a mapping instrument:
- Confirm that the selected mode is intended for masonry, concrete or comparative building-material measurement.
- Establish the typical response over several apparently normal locations.
- Scan in a consistent grid and record every location.
- Repeat high readings from another direction where appropriate.
- Look for patterns rather than relying on one isolated number.
- Use the pattern to guide investigation and additional specified testing.
A color zone, alarm or 0–100 scale can make surveys faster, but buyers must know how that output was defined. “100” may represent the upper end of a relative scale rather than 100% water by mass or 100% relative humidity.
Common mistakes before flooring installation
- Using one reading for the entire floor: moisture distribution is rarely uniform.
- Trusting appearance or touch: the exposed surface can dry before the interior.
- Using a wood scale on concrete: the number may have no valid concrete interpretation.
- Treating every displayed percentage as equivalent: moisture content, relative humidity, vapor emission and relative indexes are different.
- Ignoring service conditions: temperature and ambient RH influence both the slab and the test.
- Skipping the flooring manufacturer's instructions: the product system defines the applicable limit and accepted method.
- Failing to document locations: an unlocated reading is difficult to verify or repeat.
- Using screening results as a warranty sign-off: complete the specified acceptance test.
What distributors should compare in a concrete moisture meter
For a distributor or private-label buyer, a long measurement range is not enough. The scale must be understandable and supportable in the target market.
| Specification to verify | Why it matters |
|---|---|
| Scale definition | Clarifies whether the output is true moisture content, RH or a relative index |
| Supported materials and modes | Prevents a wood calibration from being misapplied to concrete or drywall |
| Repeatability | A mapping tool must distinguish a real pattern from instrument variation |
| Sensing field and stated depth | Helps the user understand what volume of material influences the reading |
| Verification or calibration method | Supports routine checking and consistent after-sales guidance |
| Environmental limits | Defines operating temperature and humidity conditions |
| Sensor shape and contact area | Affects access to corners, curved surfaces and rough building materials |
| Documentation | Users need clear instructions, limitations, alarms and result interpretation |
| Batch consistency | Distributors need replacement units to respond consistently with earlier stock |
Before marketing any model as a concrete moisture meter, test samples on representative materials and review the manual, display terminology and packaging claims. A product page should state whether concrete readings are quantitative or comparative.
ZYD's ZL62B moisture meter is offered for wood and material-moisture screening. Buyers should confirm the material modes, scale definition, sensing depth and configuration required for their market before ordering samples. For timber-specific sampling and interpretation, see How to Use a Wood Moisture Meter. You can also browse the complete ZYD test and measurement catalog.
Frequently asked questions
Can a pinless moisture meter tell whether concrete is ready for flooring?
It can quickly identify relative differences and suspicious areas. It should not be treated as the final acceptance test when the floor-system specification requires ASTM F2170, ASTM F1869 or another method.
What moisture percentage is acceptable for a concrete floor?
There is no universal percentage that applies to every instrument and flooring system. First identify what the meter measures and which test method the flooring or adhesive manufacturer accepts. Compare results only with a limit expressed for that method.
Is ASTM F2170 better than a surface moisture meter?
They serve different purposes. A surface meter is efficient for mapping a large area. ASTM F2170 provides an in-situ RH result used for quantitative decisions when specified. Many professional workflows use screening first and the required acceptance test second.
Can a wood moisture meter be used on concrete?
Only when the instrument manufacturer provides a suitable concrete, masonry or relative material mode. Do not interpret a wood percentage scale as concrete moisture content.
How many places should be tested?
For an informal scan, use enough points to map the whole slab rather than only convenient locations. For acceptance testing, follow the minimum number and distribution required by the current standard, project documents and flooring manufacturer.
Can thermal imaging replace a moisture meter?
No. A thermal camera detects surface-temperature patterns, not moisture. It can help locate areas for further investigation, but confirmation requires a suitable moisture method and physical inspection.
A reliable answer comes from the right sequence
The most useful concrete-moisture workflow is not “take one reading and install.” It is a sequence: understand the floor system, condition and inspect the building, map the slab, investigate anomalies, complete the specified acceptance test and document the decision.
If you are sourcing moisture meters, thermal imagers or building-inspection instruments for distribution or private-label programs, ZYD can help compare sensor types, material modes, scale definitions, alarm functions, documentation and packaging options. Share the intended application and market requirements so that sample evaluation begins with the correct measurement claim.