How to Use a Sound Level Meter Correctly: Practical Noise Measurement Guide
Learn how to use a sound level meter correctly, select dBA and Fast/Slow settings, avoid measurement errors and compare meters for industrial use.
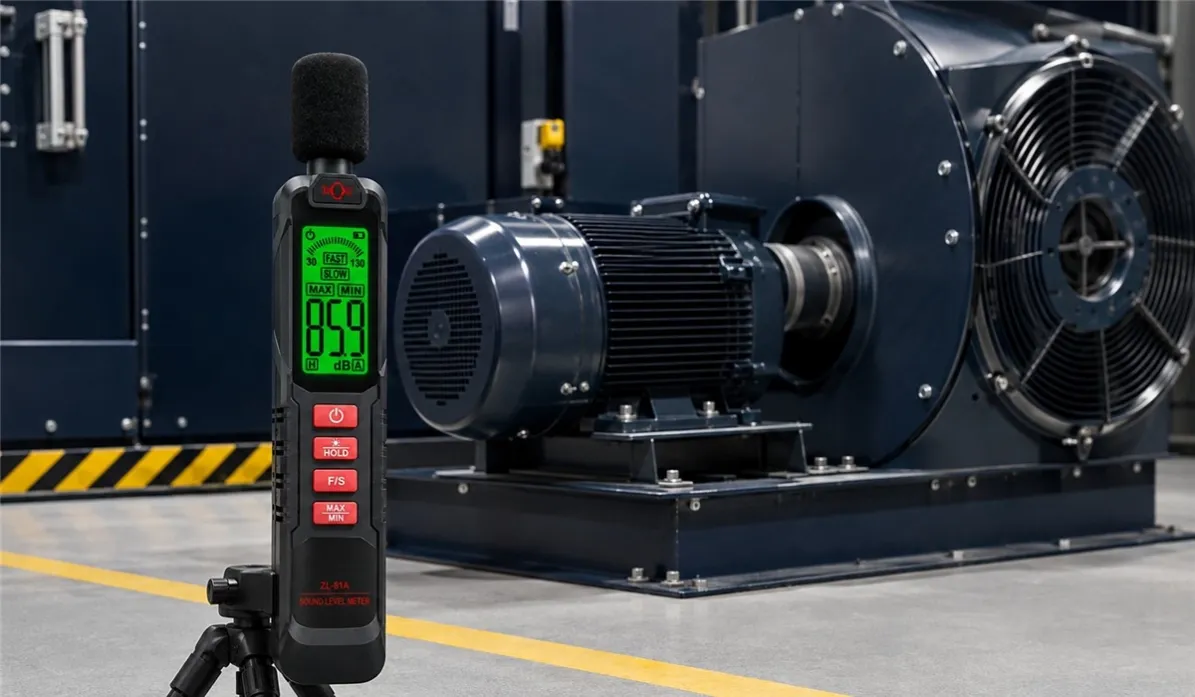
A sound level meter can produce a number in seconds. Producing a useful measurement takes more care. The instrument setting, microphone position, distance from the source and operating condition of the machine can change the result enough to make two readings difficult to compare.
Quick answer: choose the frequency and time weighting required for the task, check the meter and calibrate it when the procedure requires, position the microphone at the actual point of interest, allow the reading to stabilize, and record the level together with the settings, distance, location and source condition. A decibel value without this context is rarely sufficient for maintenance, purchasing or compliance decisions.
This guide explains how to use a sound level meter for practical industrial and HVAC noise checks. It also shows distributors and instrument buyers which specifications matter beyond the headline measurement range.
What does a sound level meter measure?
A sound level meter uses a microphone to convert changes in air pressure into an electrical signal. The instrument processes that signal and displays sound pressure level in decibels.
Most handheld meters are used for spot measurements: checking a machine, comparing two locations or screening an area for further investigation. An integrating sound level meter can calculate values such as equivalent continuous sound level over a measurement period. A personal noise dosimeter measures a worker's accumulated exposure during a shift. These are related instruments, but they do not answer exactly the same question.
| Instrument | Best used for | Important limitation |
|---|---|---|
| Basic sound level meter | Spot checks, source comparison and preliminary surveys | A momentary reading does not represent a full-shift exposure |
| Integrating sound level meter | Time-averaged levels and more formal surveys | Requires the correct measurement protocol and settings |
| Noise dosimeter | Personal exposure over a work period | Results depend on where and how the microphone is worn |
| Octave-band analyzer | Finding which frequency bands dominate the noise | More complex and usually unnecessary for a basic spot check |
Understand the settings before measuring
dBA, dBC and frequency weighting
The microphone detects a broad range of frequencies, but the meter may apply a weighting filter before displaying the result.
- A-weighting, shown as dBA, reduces the contribution of very low and very high frequencies. It is widely used for general workplace and environmental noise assessment.
- C-weighting, shown as dBC, has a flatter response across much of the audible range and can be useful when low-frequency sound or high-level peaks matter.
- Z-weighting is essentially a flat frequency response within the instrument's specified range.
Not every meter supports all three. If a product measures only dBA, it may suit general screening but not a procedure that specifically requires C- or Z-weighted results. Buyers should match the available weighting to the target application rather than assuming that every “decibel meter” is interchangeable.
Fast and Slow time weighting
Time weighting controls how quickly the displayed level reacts to changing sound.
- Fast responds quickly and makes short-term changes easier to observe.
- Slow smooths fluctuations and gives a steadier display for relatively stable machinery or background noise.
Fast and Slow do not change the acoustic environment; they change how the instrument presents a varying signal. Use the setting specified by the relevant method, and keep it consistent when comparing locations or before-and-after results.
Range, resolution and accuracy
A 30–130 dBA measurement range describes the lowest and highest levels the meter is designed to display. It does not describe accuracy. Likewise, a 0.1 dB display resolution does not mean the instrument is accurate to ±0.1 dB.
For procurement, compare the stated accuracy, frequency range, applicable standard, operating environment and calibration documentation separately. IEC 61672 specifies Class 1 and Class 2 performance categories for sound level meters. Do not market an instrument as Class 1 or Class 2 unless the exact model has evidence demonstrating conformity to the applicable requirements.
How to use a sound level meter correctly
1. Define the measurement question
Decide what the reading must tell you. Are you comparing two fans, checking an HVAC complaint, documenting a machine after maintenance or screening a workplace area? The purpose determines the location, settings, measurement duration and instrument class.
A clear question might be: “Did replacing the bearing reduce the A-weighted level at the operator position while the machine ran at the same load?” That is more useful than simply asking, “How loud is the machine?”
2. Inspect the meter and microphone
Check the microphone, windscreen, display and battery condition. Make sure the measurement range covers the expected level. Condensation, heavy dust, a damaged microphone or a low battery can undermine a survey before it begins.
3. Confirm calibration requirements
For documented occupational or regulatory measurements, a field check with a compatible acoustic calibrator is commonly performed before and after the measurement session, in addition to periodic laboratory calibration. Follow the instrument manual and the procedure that applies in the destination market.
A meter that powers on and displays a plausible value has not necessarily passed a calibration check. Distributors serving industrial safety customers should make clear whether an acoustic calibrator and calibration certificate are included, optional or unavailable.
4. Select the required settings
Choose frequency weighting, time weighting and range before recording the result. For many general noise checks, A-weighting is the starting point. Fast or Slow depends on the source and the test procedure. If the meter provides manual ranges, avoid a range that produces an over- or under-range indication.
5. Reproduce the source operating condition
Noise changes with speed, load, airflow, open guards and nearby activity. Record whether the machine was idling, under normal load or at maximum duty. For HVAC work, note fan speed, grille position, doors, dampers and other equipment running at the same time.
6. Position the microphone consistently
Measure at the location that represents the question: the operator's ear position, a specified distance from the machine, the center of a room or a defined property boundary. Keep the distance and microphone orientation consistent between comparative readings.
Do not stand directly between the microphone and the source. Your body can shield or reflect sound. Hold the meter away from your torso or use a tripod where practical. Avoid placing the microphone close to walls, large machine panels or corners unless that is the required measurement position, because reflected sound can affect the result.
Use a windscreen outdoors or in strong airflow. Point or orient the microphone as the manufacturer instructs; microphone response is not identical for every design.
7. Allow the reading to settle and sample the condition
Watch the display long enough to understand whether the source is stable or varying. A single value captured at a convenient moment can miss cycling compressors, air releases, impact events or intermittent vibration. Use Max, Min or logging functions when the instrument provides them and the task requires them.
8. Record more than the decibel value
A repeatable field record should include:
- Date, time and exact measurement location
- Meter model and serial or asset number
- Calibration or field-check status
- dBA, dBC or other frequency weighting
- Fast, Slow or integrating setting
- Distance and microphone orientation
- Machine speed, load and operating mode
- Background noise and unusual events
- Average, maximum and measurement duration where applicable
Practical measurement setups
| Application | Useful approach | What to keep constant |
|---|---|---|
| Compare a machine before and after repair | Measure at marked positions under the same operating load | Distance, orientation, settings, speed and nearby equipment |
| HVAC room-noise check | Measure at the listener or occupant position and at several room points | Fan mode, doors, dampers, occupancy and background sources |
| Locate a dominant noise source | Take a planned grid of spot readings and move progressively closer | Source condition and meter settings |
| Workplace screening | Measure representative work areas and tasks to identify where a detailed exposure study may be needed | Task, production rate, worker position and duration |
| Incoming product inspection | Compare samples in a controlled fixture or test space | Test distance, background level, power supply, mounting and operating cycle |
Common sound level measurement mistakes
- Reporting “dB” without the weighting. A result should identify dBA, dBC or the required metric.
- Comparing readings made at different distances. Small changes in position can produce a large difference near a source.
- Holding the meter against the body. The operator can reflect or block sound.
- Measuring in airflow without a windscreen. Wind noise can raise the indicated level.
- Ignoring background noise. Nearby traffic, conversation or another machine can dominate the measurement.
- Confusing resolution with accuracy. More display digits do not guarantee a more reliable result.
- Skipping the calibration check. This makes formal measurement records difficult to defend.
- Using one spot reading as a worker's daily exposure. Exposure depends on level and time and normally requires a suitable survey method or dosimeter.
- Changing settings between comparison readings. The values may no longer be directly comparable.
How should B2B buyers compare sound level meters?
Distributors and private-label buyers should start with the customer's measurement task, then compare the following items:
- Meter type: basic, integrating, logging, dosimeter or octave-band capability
- Measurement range: sufficient for both quiet areas and the highest expected source
- Frequency response: the specified acoustic frequency range
- Frequency weighting: A, C and Z options required by the application
- Time weighting: Fast, Slow and any additional response modes
- Accuracy evidence: stated tolerance, applicable standard and available reports
- Calibration support: compatible calibrator, field adjustment and certificate options
- Data functions: Max/Min, hold, average, logging, time history and export
- Field usability: backlight, battery life, tripod thread, windscreen and protective case
- OEM readiness: packaging, manual language, branding space, labels and traceability
The ZYD ZL81A digital sound level meter is positioned for practical noise spot checks. Its product page lists a 30–130 dBA measurement range, 125 Hz–8 kHz frequency response, 0.1 dB display resolution, color screen and two-AA-battery power. Buyers should confirm accuracy, weighting modes, response settings and documentation for the exact order configuration before specifying it for a regulated measurement program.
For plant restart and equipment-condition work, combine noise checks with a repeatable instrument startup checklist. You can also review the broader ZYD test and measurement catalog when building a maintenance or inspection tool range.
Frequently asked questions
What is the difference between dB and dBA?
Decibel is the logarithmic unit used to express a sound level. dBA means the result has been processed with A-frequency weighting. A report that says only “dB” may be incomplete because it does not identify the weighting or measurement conditions.
Should I use Fast or Slow on a sound level meter?
Use the setting required by the test method. Fast makes short-term variations easier to see, while Slow produces a steadier display for fluctuating but relatively continuous noise. Use the same setting for readings you intend to compare.
Can a smartphone app replace a sound level meter?
A phone app can be useful for preliminary awareness, but the microphone, calibration and software performance vary by device. It should not automatically be treated as a replacement for a calibrated instrument required by a workplace, contractual or regulatory procedure.
Does a higher displayed resolution mean better accuracy?
No. Resolution is the smallest display step; accuracy describes how close the reading is expected to be to the true value under stated conditions. Review both specifications separately.
Can a sound level meter prove that workplace noise is compliant?
A properly specified and calibrated meter can form part of a compliance survey, but one spot reading is usually not enough. The applicable limit, exchange rate, duration, task pattern and local procedure must also be considered. A personal dosimeter may be needed for varying full-shift exposure.
Why do readings change when I move the meter?
Sound level changes with distance, direction, reflections, barriers and room modes. Close to machinery, different components can dominate at different positions. Mark the measurement point and repeat the same setup when tracking changes.
Make every reading repeatable
The most useful sound measurement is not simply the highest number on the screen. It is a result another technician can reproduce: the same position, settings, source condition and documented meter status. That discipline turns a handheld sound level meter from a rough indicator into a practical maintenance and quality-control tool.
If you are sourcing sound level meters or environmental measurement instruments for distribution, MRO supply or private-label programs, ZYD can help compare models by measurement task, feature set, accessories, documentation and target-market requirements. Share the applications and customer profile you serve, and we can recommend a suitable configuration for sampling or quotation.